1BSSGX rev A
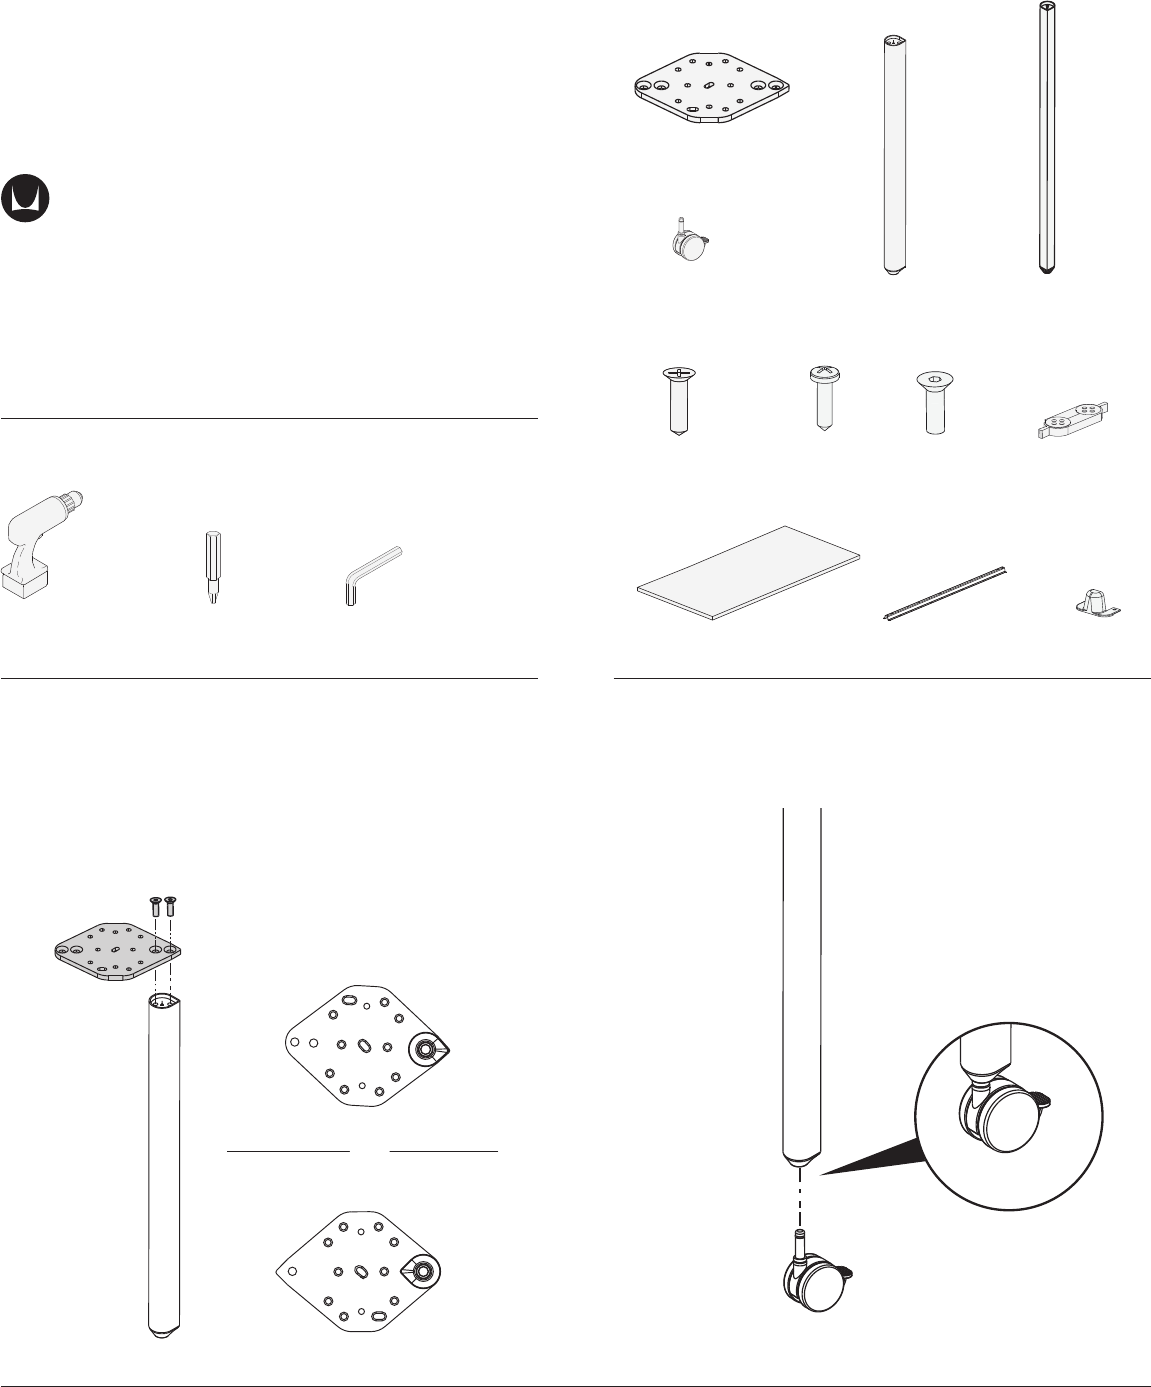
Tools Required
HermanMiller
Rectangular table assembly Instructions
How to assemble Rectangular table
5mm Allen WrenchPower Driver Phillips Bit
Parts Included
# Flat Head
Tapping Screw
# Pan Head
Tapping Screw
Stiener Stiener End Cap
Ganging bracket
M8 Flat Head Screw
Caster Leg
Glide Leg
Caster w/ Brake
Plate
Work surface
Rectangular table
Step 1
. Attach top plate to the leg, with two M flat head machine screws.
Tighten screws until snug plus / turn.
. There are ways to mount the plate to the leg :
A. Square-Out for end legs and all free standing tables.
B. Round-Out for intermediate/shared legs
. Insert caster stem into bottom of leg until fully seated.
Note: This step is for caster option only.
A.
B.
OR
Step 2
HermanMiller Assembly Instructions1
Assembly Instructions2HermanMiller
1BSSGX rev A
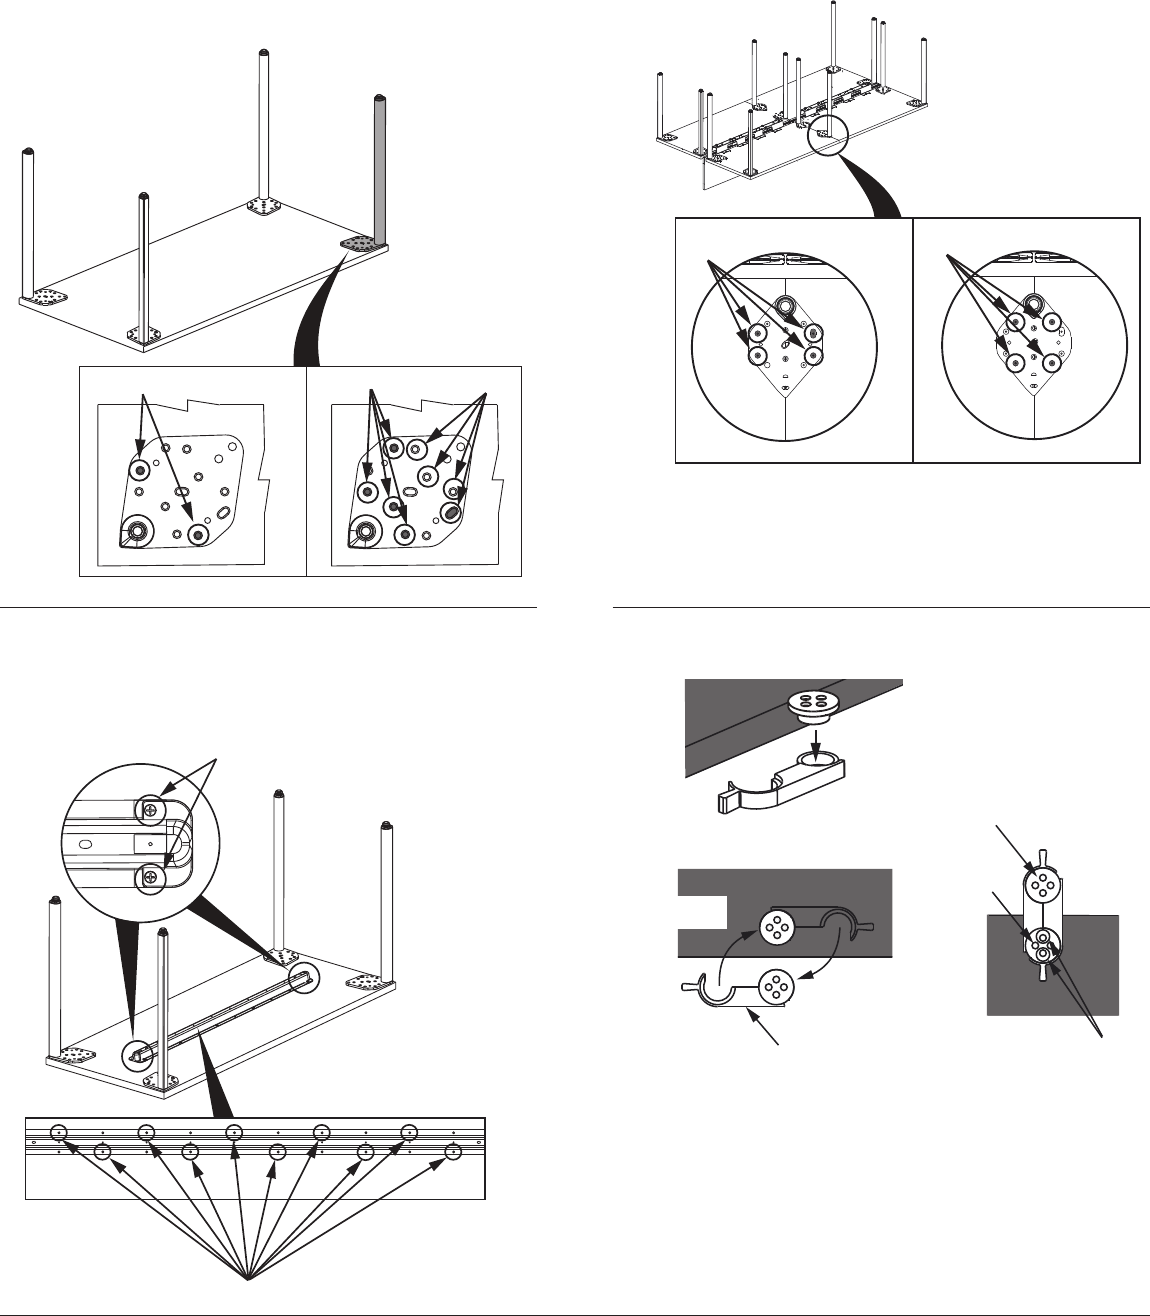
Step 3a
b. To attach the intermediate legs to worksurface follow the below
procedure.
A. Locate intermediate leg with the pilot holes.
B. Attach the leg with the remaining flat head screws.
Step 4 Step 5
. Attach ganging bracket to surface. (Optional).
Step 3b
. To attach the stiener to worksurface follow the below procedure.
A. Locate stiffener with pilot holes on the ends. Place end cap over the
end holes and install together with self tapping screws.
B. Install remaining screws in an alternating pattern.
A
B
A
B
B
Install clip on puck
before screwing it to surface.
Screw in the "pucks"
using the two piloted
holes.
Swing clips around
pucks to latch.
Screw in the
remaining two
screws.
The second puck gets
screwed into the
other surface
Disassembly for Recycling:
Materials Identication and Segregation:
Where possible, plastic components are marked with ASTM recycling codes. Use these codes to identify
material type for recycling. Non marked components should be treated as mixed plastic. Ferrous
metals can be identied using a small magnet for recycling. Non-ferrous metals should be separated
andrecycled separately. To disassemble product, reverse the above installation steps
© Herman Miller, Inc., Zeeland, Michigan Printed in U.S.A.
® YHermanMiller, Abak, Action Oce, Avive, Co/Struc, Ethospace, Intersect, Meridian, Passage,
Prospects, Quadrant, Resolve, Scooter, Vivo interiors, Lifework, Teneo, and V-Wall are among the
registered trademarks of Herman Miller Inc.
TM
Burdick Group, CLT, Flex-Edge, My Studio Environments, and Q system, are among the trademarks of
Herman Miller Inc.
Illustrations and specications are based on the latest product information available at the time of
publication. The right is reserved to make changes in design and specications at any time, without
notice, and also to discontinue products.
A
B
B
a. To attach legs to the worksurface follow the below procedure.
A. Screw two flat head screws into marked two piloted holes first to locate
the leg.
B. Finish by installing additional flat head screws in marked locations that
are NOT piloted. These screws are field drilled.
Note: Attach legs with worksurface upside down
