Z
© 2017 Herman Miller, Inc. Zeeland, Michigan. Printed in the U.S.A.
® Y, Z and Canvas Office Landscape are among the registered trademarks of Herman Miller, Inc.
Illustrations and specifications are based on the latest product information available at the time of publication.
The right is reserved to make changes in design and specifications at any time, without notice, and also to discontinue products.
Part no. 1b2ghf rev E.
1
Y
Canvas Office Landscape
®
External Direct Connect Power Entry
Installation and Disassembly for Recycling Instructions
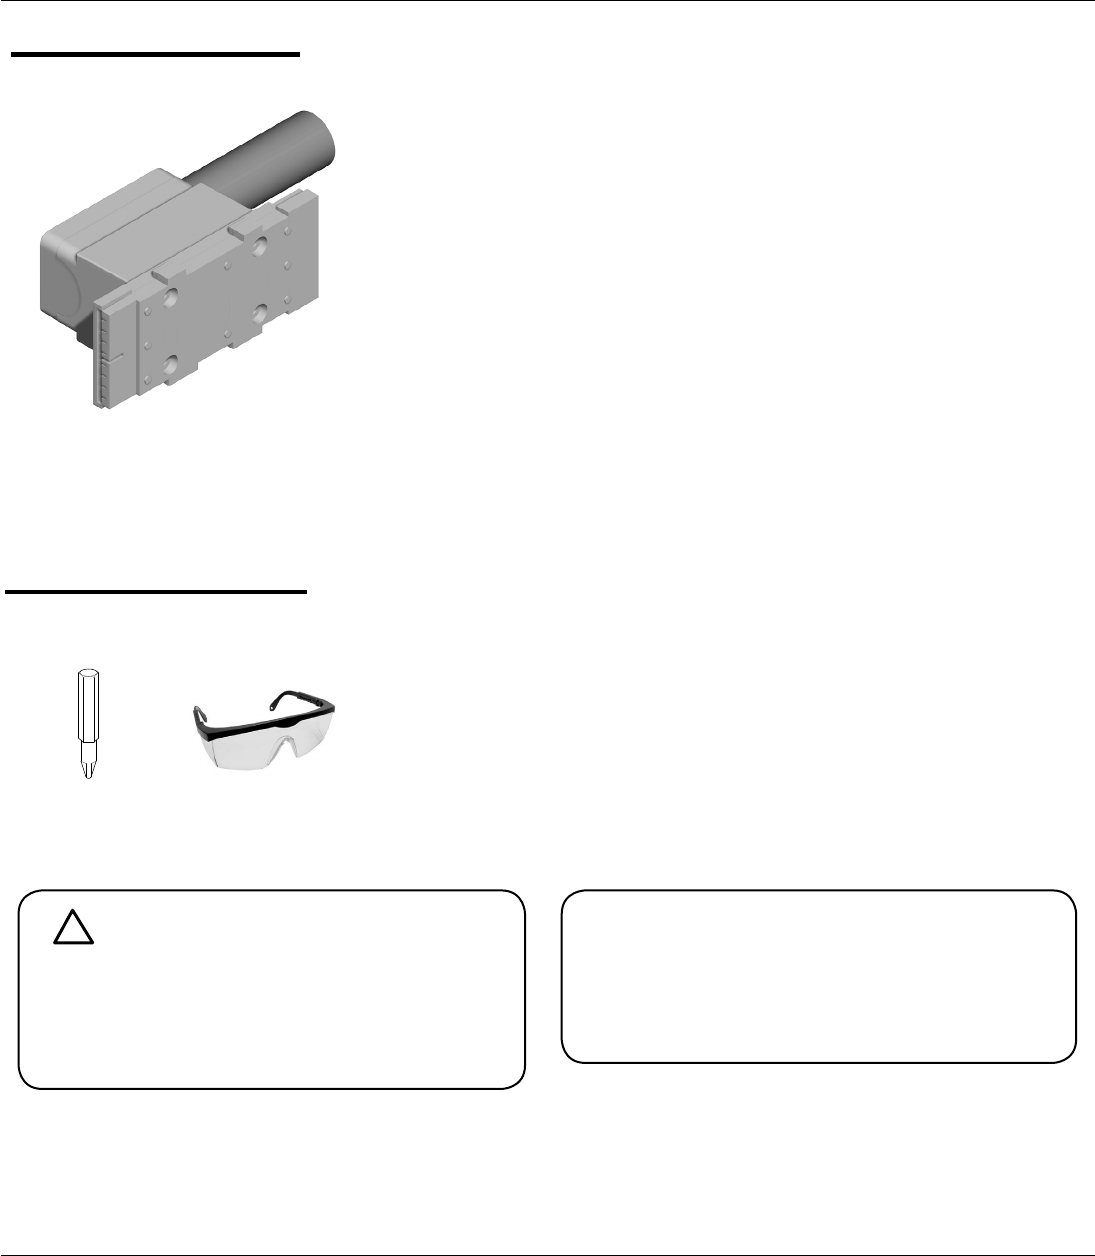
Parts Included:
IMPORTANT: Save these instructions for layout changes.
A
Power Entry Harness
Tools Required:
#2 Phillips Bit
WARNING
Risk of re or electrical shock. This ofce furnishing
system may be connected to more than one source
of supply. All sources must be disconnected prior to
any servicing. No single circuit may be powered by
more than one source.
NOTICE
All electrical connections to building electrical
sources must be made by a qualied electrician
according to national, state and local electrical
codes.
!
Safety Glass
Z
© 2017 Herman Miller, Inc. Zeeland, Michigan. Printed in the U.S.A.
® Y, Z and Canvas Office Landscape are among the registered trademarks of Herman Miller, Inc.
Illustrations and specifications are based on the latest product information available at the time of publication.
The right is reserved to make changes in design and specifications at any time, without notice, and also to discontinue products.
Part no. 1b2ghf rev E.
2
Z
© 2017 Herman Miller, Inc. Zeeland, Michigan. Printed in the U.S.A.
® Y, Z and Canvas Office Landscape are among the registered trademarks of Herman Miller, Inc.
Illustrations and specifications are based on the latest product information available at the time of publication.
The right is reserved to make changes in design and specifications at any time, without notice, and also to discontinue products.
Part no. 1b2ghf rev E.
3
Assembly Instructions:
1
2
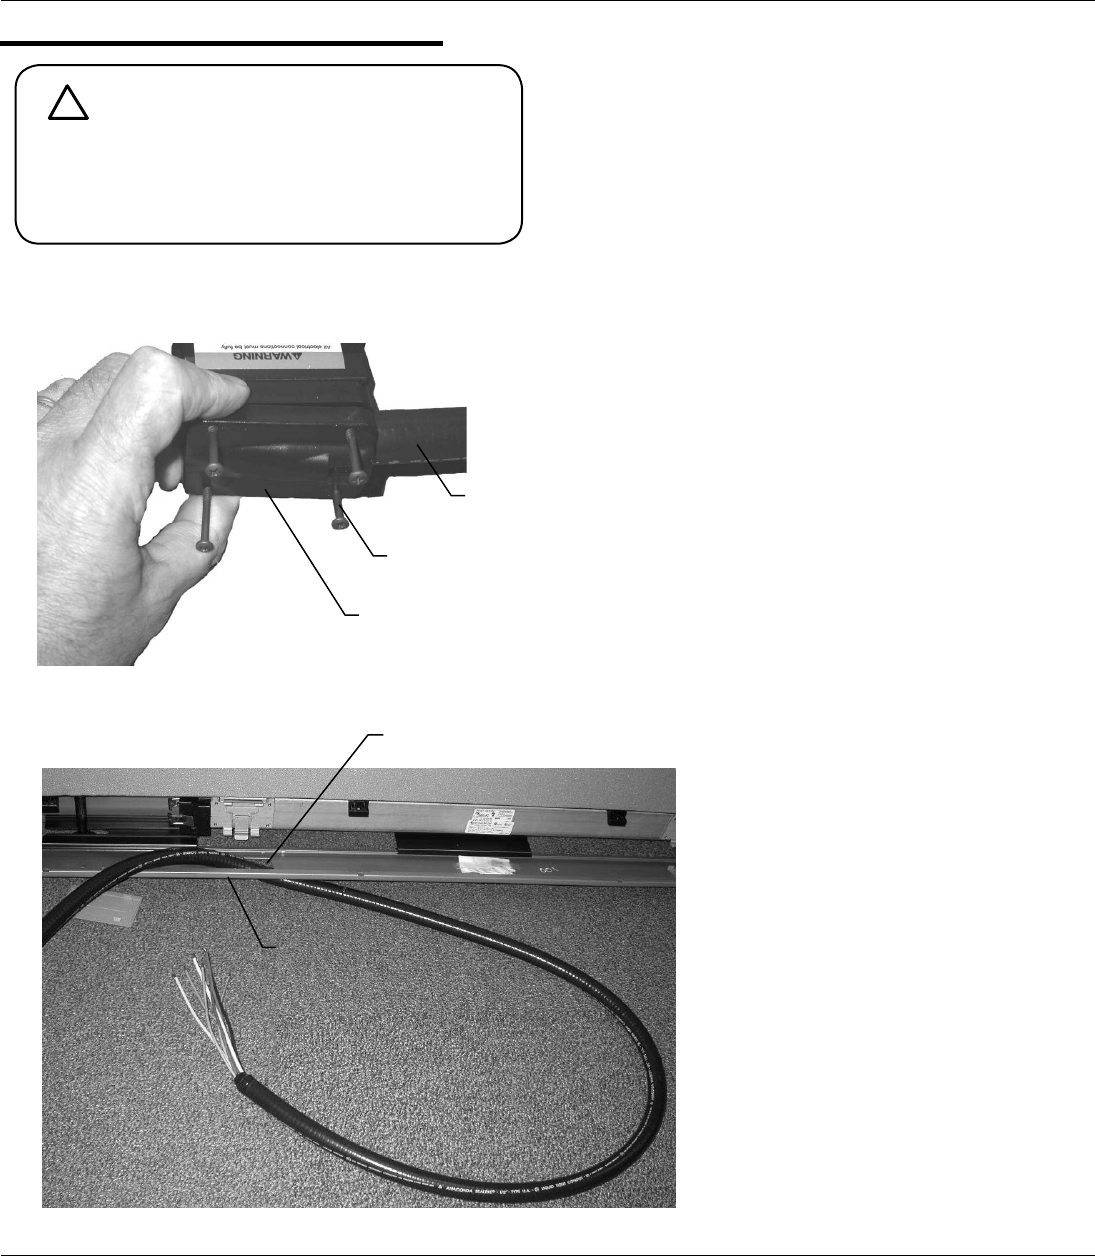
WARNING
Disconnect electrical power before installation.
Failure to do so can cause electrical shock and
personal injury.
!
1. Loosen 4 Screws on Cover and remove.
1. Feed open wire end of
Power Entry Harness
through Port Opening In
Base Cover.
A
Screws
Cover
Base Cover
Port Opening
Z
© 2017 Herman Miller, Inc. Zeeland, Michigan. Printed in the U.S.A.
® Y, Z and Canvas Office Landscape are among the registered trademarks of Herman Miller, Inc.
Illustrations and specifications are based on the latest product information available at the time of publication.
The right is reserved to make changes in design and specifications at any time, without notice, and also to discontinue products.
Part no. 1b2ghf rev E.
4
3
4
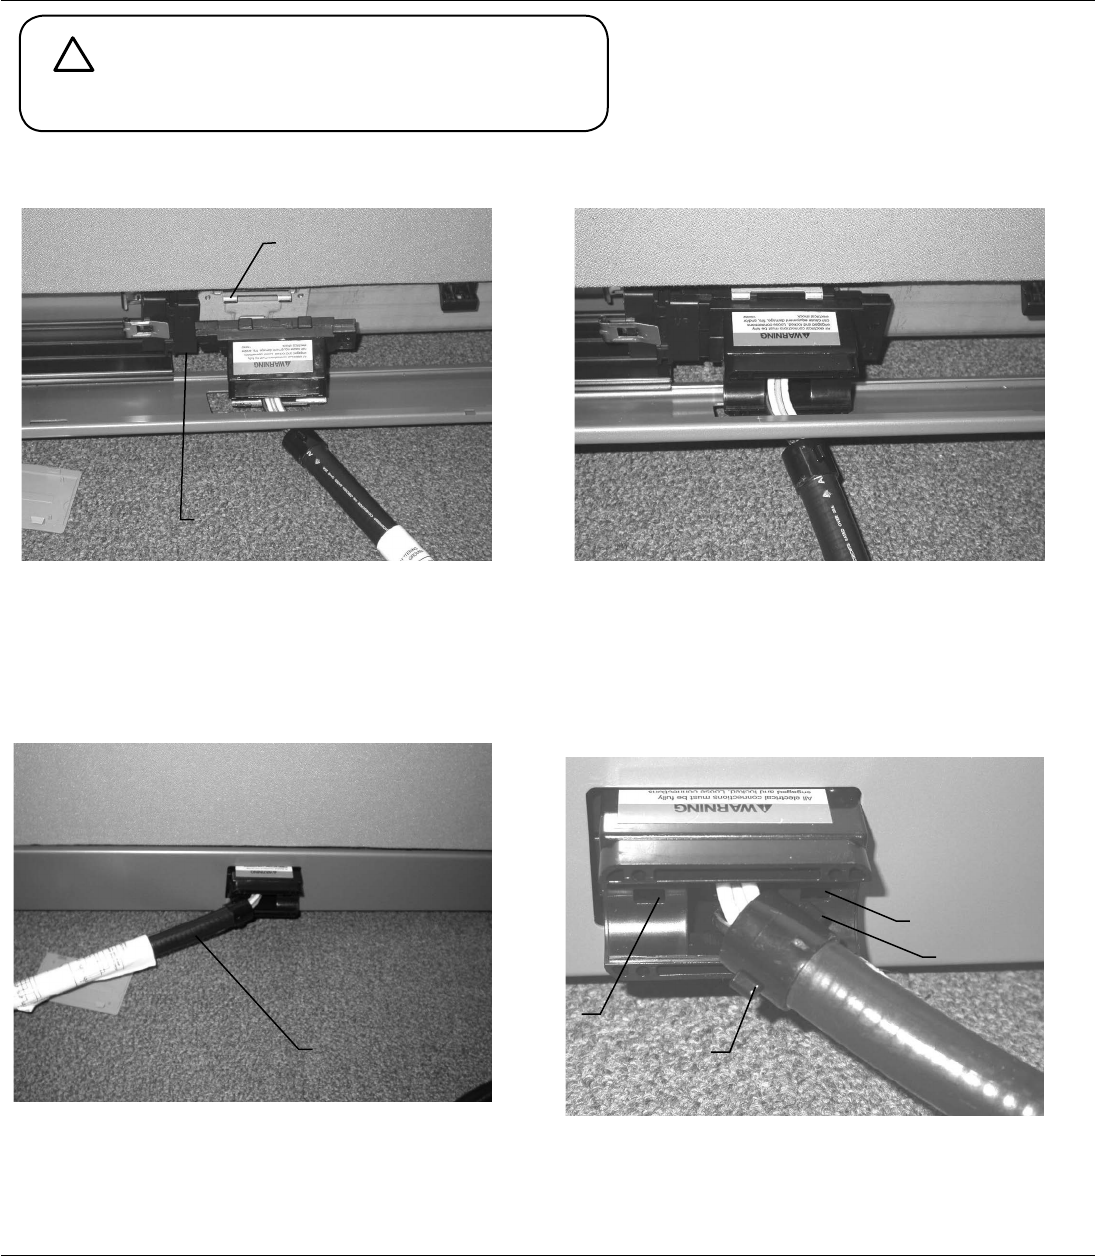
WARNING
All electrical connections must be fully engaged and locked.
Loose connections can cause re and /or electrical shock.
!
1. Place connector end of Power Entry Harness into a Receptacle Bracket of
Distribution Harness.
2. Push into Receptacle. Make sure connection fully engages.
1. Close Base Cover.
2. Determine which direction Conduit will run.
3. Align Tab on Conduit end with Slot in Body.
Right Hand
Receptacle
Distribution Harness
Receptacle Bracket
Conduit
Slot
Slot
Tab
Tab
Z
© 2017 Herman Miller, Inc. Zeeland, Michigan. Printed in the U.S.A.
® Y, Z and Canvas Office Landscape are among the registered trademarks of Herman Miller, Inc.
Illustrations and specifications are based on the latest product information available at the time of publication.
The right is reserved to make changes in design and specifications at any time, without notice, and also to discontinue products.
Part no. 1b2ghf rev E.
5
5
6
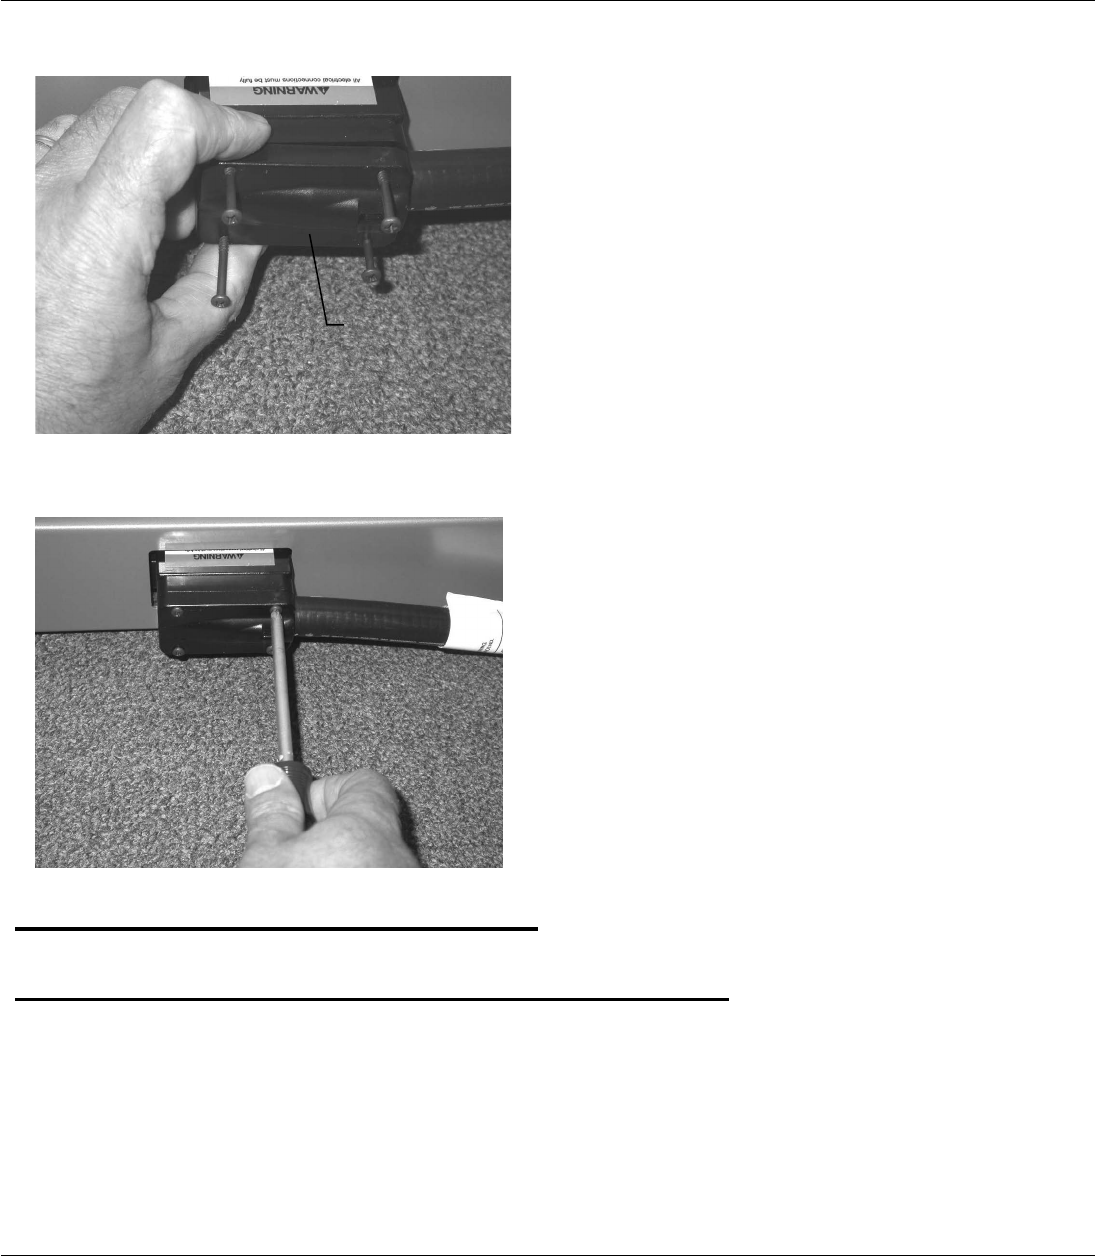
1. Return Cover to Body.
1. Hand tighten 4 Screws on Cover as
shown
2.Hardwire open wire end of Harness into
oor monument, perimeter wall or
column outlet. (Conduit connector
supplied by customer.)
Cover
Disassembly for Recycling:
Materials Identication and Segregation:
Where possible, plastic components are marked with ASTM recycling codes.
Use these codes to identify material type for recycling. Non marked components
should be treated as mixed plastic. Ferrous metals can be identied using a
small magnet for recycling. Non-ferrous metals should be separated and recycled
separately.
To disassemble product, reverse the above installation steps.
